How to Install Your eSIM on iPhone (QR Code & Manual)
Before You Start
Make sure you have the following ready:
- An iPhone XS or later (iPhone XS, XR, 11, 12, 13, 14, 15, or 16 series)
- iOS 16 or newer (go to Settings > General > Software Update to check)
- A WiFi connection — the eSIM profile downloads over the internet, so you need a stable connection
- A carrier-unlocked phone — if your phone is locked to a carrier, the installation will fail. Check here if you're not sure.
- Your QR code or activation details from your Only eSIM purchase email. Can't find it?
Method 1: Install via QR Code (Recommended)
This is the fastest way to install your eSIM. You'll need to display the QR code on another screen (laptop, tablet, or another phone) so your iPhone camera can scan it.
- Open Settings on your iPhone
- Tap Cellular (or Mobile Data in some regions)
- Tap Add eSIM
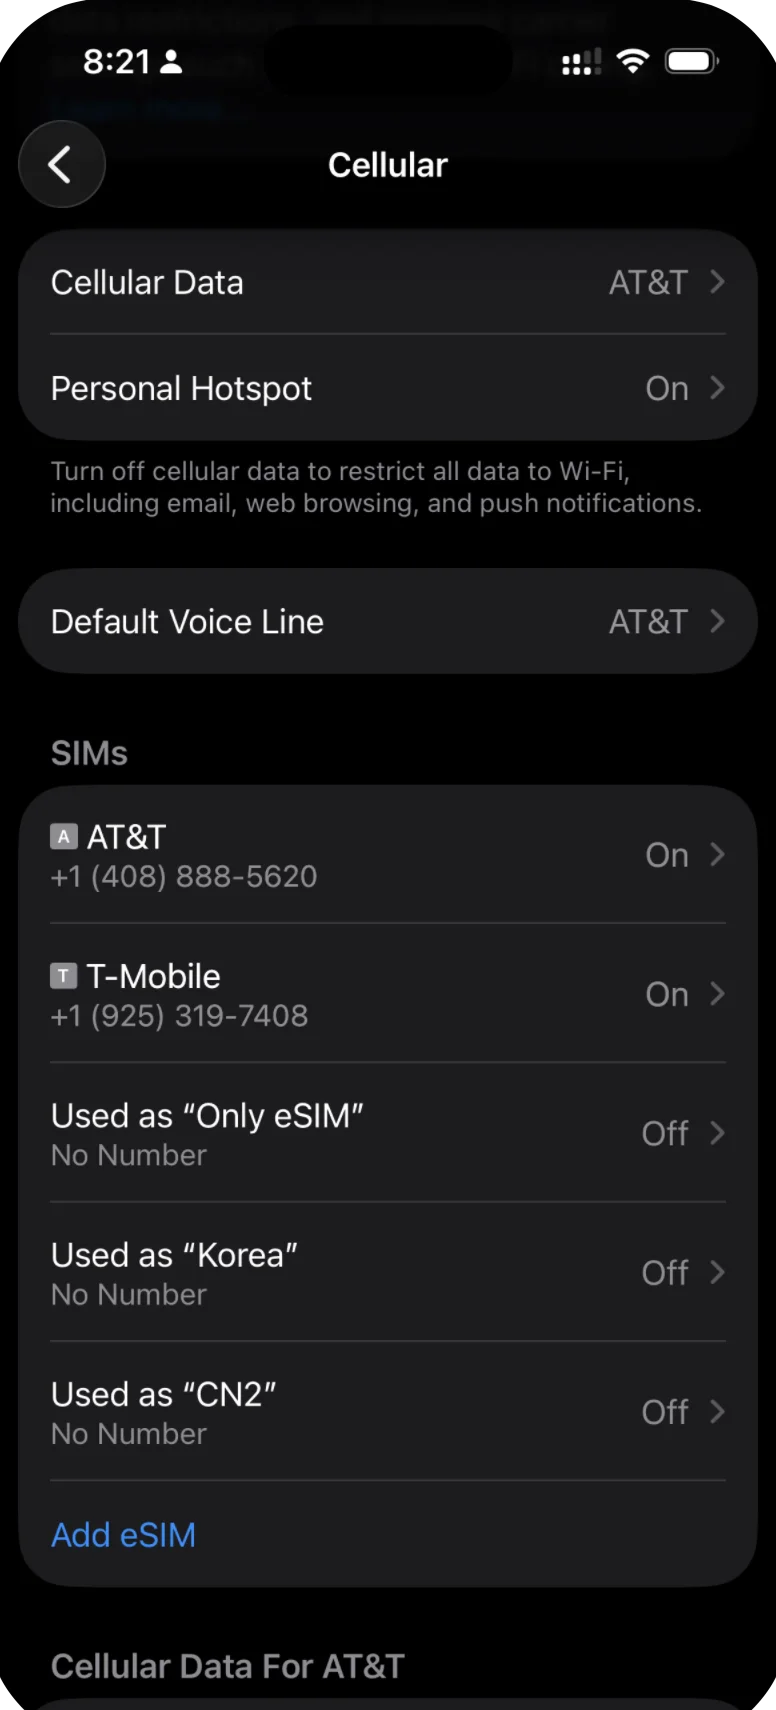
Scroll down in Cellular settings and tap "Add eSIM."
- Tap Use QR Code
- Your camera will activate — point it at the QR code from your purchase email
- Wait for the "Cellular Plan Detected" prompt to appear
- Tap Continue
- Wait for the eSIM profile to download (this usually takes 10-30 seconds)
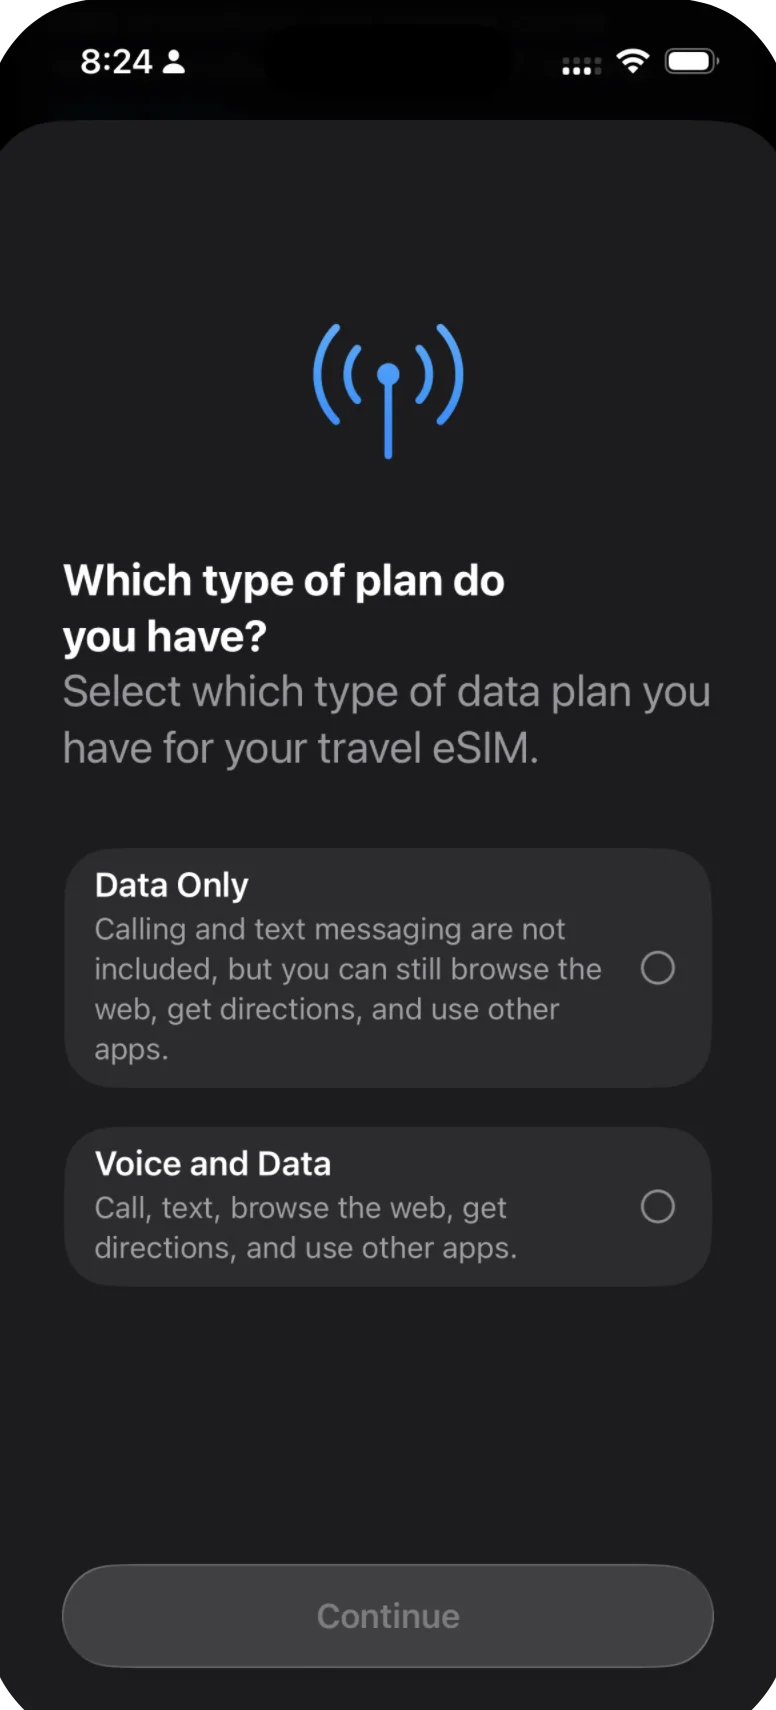
Select "Data Only" since Only eSIM plans are data-only.
- When prompted to label the plan, give it a descriptive name like "Japan Travel" or "Europe Data"
- Tap Done
Your eSIM is now installed. You should see it listed under your cellular plans.
Method 2: Install via Manual Entry
If you can't scan the QR code (for example, if the QR code is on the same phone), you can enter the activation details manually.
- Open Settings
- Tap Cellular (or Mobile Data)
- Tap Add eSIM
- Tap Enter Details Manually
- Enter the SM-DP+ Address from your purchase email (this is a server address, something like
smdp.example.com) - Enter the Activation Code (also in your email — it's a long alphanumeric string)
- If there's a Confirmation Code, enter that too (not all plans require one)
- Tap Next
- Wait for the profile to download
- Label the plan with a recognizable name
- Tap Done
Both the SM-DP+ address and activation code are included in the eSIM details email you received after purchase. If you're not sure where to find them, check our guide to finding your QR code and activation details.
Important: Don't Activate Yet (For Most Plans)
After installation, your iPhone may ask you if you want to turn on the new cellular line right away. If you haven't arrived at your travel destination yet, select "Not Now" or leave the line turned off.
Here's why: activation timing varies by plan.
- Instant activation plans start their validity the moment the eSIM profile is installed. For these plans, the clock is already running — so keeping the line off won't save validity time, but it still avoids unnecessary data usage before your trip.
- Activation upon arrival plans start their validity when the eSIM first connects to a cell tower in the destination country. For these plans, keeping the line off until you land ensures the clock doesn't start early.
Check your plan details to see which type you have. When in doubt, keep the line turned off until you arrive. Our activation guide walks you through turning on the eSIM when you're ready.
Label Your eSIM Plan
After installation, it's a good idea to rename your eSIM line so you can easily identify it later — especially if you travel frequently and accumulate multiple eSIM profiles.
- Go to Settings > Cellular
- Tap the eSIM plan you just installed
- Tap Cellular Plan Label
- Choose a preset (like "Travel") or tap Custom Label and type your own (e.g., "Thailand 10GB" or "EU Summer Trip")
This label appears throughout your phone's settings wherever you choose between cellular lines, so make it something you'll recognize at a glance.
What Happens Next
Your eSIM is installed and waiting. When you arrive at your destination:
- Follow our activation guide to turn on the line
- Enable data roaming
- Set the eSIM as your default data line
- Enjoy your trip with affordable local data
Related Articles
How to Install Your eSIM on Android (QR Code & Manual)
Step-by-step guide to install your Only eSIM travel data plan on Android phones including Samsung Galaxy and Google Pixel using QR code or manual entry.
How to Set Up an eSIM on iPad or Tablet
Step-by-step guide to install a travel eSIM on iPad, Samsung Galaxy Tab, and other tablets. Check compatibility and follow setup instructions.
How to Find Your eSIM QR Code After Purchase
Can't find your eSIM QR code? Here's where to look — check your email, spam folder, or log in to your Only eSIM account to view your QR code and activation details.
Was this article helpful?